So you’ve decided that you need to purchase your own domain – good on you! You currently use Blogger.com to publish your blog and you’ve no idea where to start to change your .blogspot URL into a myblog.com – well this little how to is going to show you how!
Purchase Your Domain
1. First of all you need to buy your own domain! I’ve always stuck to using GoDaddy.com over the years because of how easy it is to use and you really can’t grumble at the price. They always tend to have promotional deals on for your first registration for £0.99* which at less than your daily coffee is a steal for your own little piece of the internet.
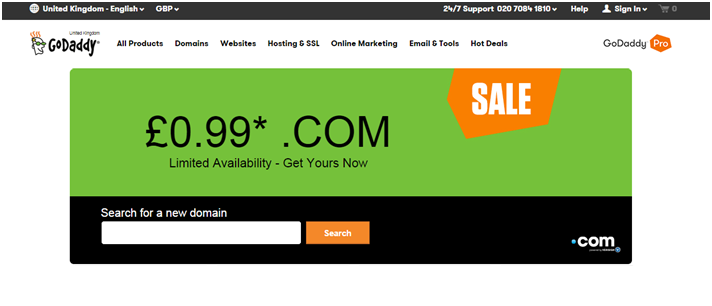
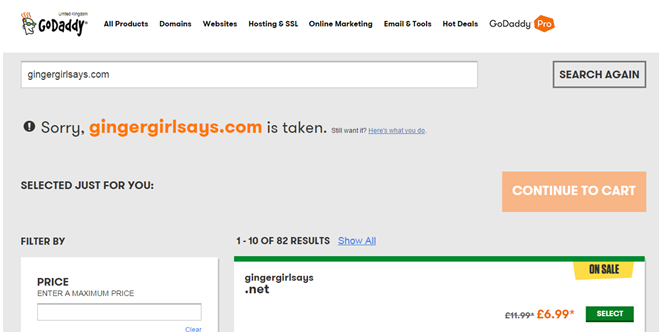
Log on to www.godaddy.com and type your required domain into the “search for a new domain” box and cross your fingers that somebody else hasn’t registered it already!
// EDIT: it’s worth noting that when registering your domain you’ll be given an option to make your domain private which will entail an additional fee (usually around £5.99). Without this the details that you give to register your domain (e.g home address, email address and telephone number is easily searchable via a who.is database of domains).
2. HOORAY! Your chosen domain is free! Simply select buy and follow the instructions to complete purchase. REMEMBER, if you’re planning on using this domain with Blogger you won’t require hosting or a website building package so make sure you haven’t accidentally select one of those options at the check out page!
3. CONGRATULATIONS! You’re the owner of a brand spanking new domain name. Feels good right? But how on earth do you link your domain to your Blogger without doing a Kim Kardashian and breaking the internet?
Don’t worry, I got you.
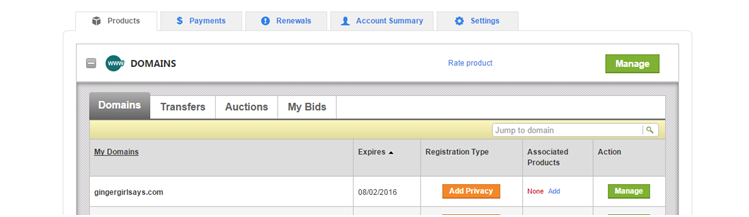
4. Login to your GoDaddy account and load up your dashboard and click on the “domains” option – it should look something a little like this but with your domain, obv.
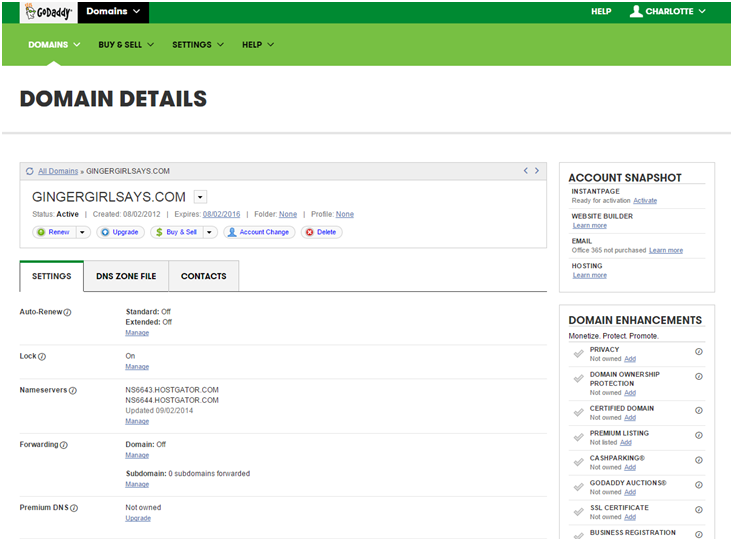
5. Click the “manage” button which will bring up a load of techy jargon that can scare the beejeezuss out of you when you see it for the first time. Your screen should look a little bit like this.
Now it’s time to configure your custom domain with Blogger so that your blog loads when you type in your shiny new domain.
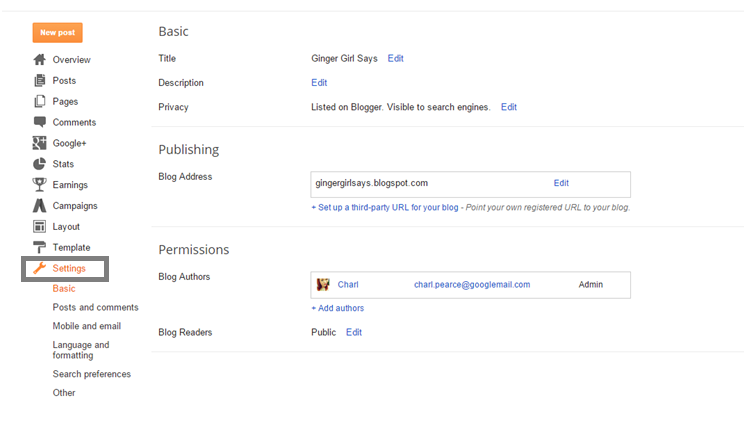 6. In another tab on your browser load up your main Blogger dashboard and select “Settings” from the left hand side.
When the settings page loads up you should see a section called “Publishing” where you’ll see your current .blogspot website address and a link below to “Set up a third party URL to your blog”. Click this.
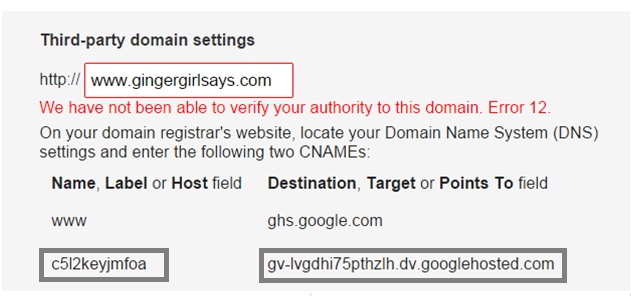 7. You now have the option to add the URL of the domain you’ve just purchased. Enter it as www.yourdomainhere.com and click save. It’ll flash up with loads of red text and tell you you’ve done it wrong, don’t worry – that’s meant to happen. This is what we need to amend to make everything work like clockwork.
Underneath the red text there should two lines that detail your CNAMES. Each CNAME is composed of two parts – Name, Label or Host and Destination, Target or Points to.
The first CNAME is the same for everyone, Name being “www” and Destination “ghs.google.com.”
The second CNAME is particular to your specific blog and individual Google Account and is therefore different for each person. These CNAMEs are made up of a combination letters and numbers. In short, jibberish.
Leave this tab open as you’ll need to refer back to it in a second.
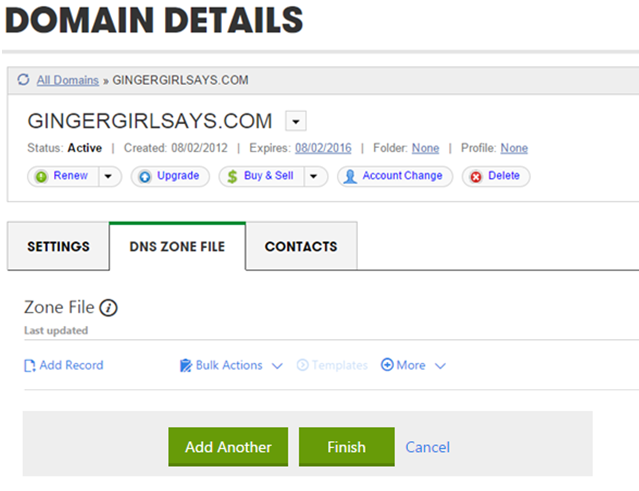
8. Go back to the tab where you have your GoDaddy domain control panel and select the DNS (Domain Name System)
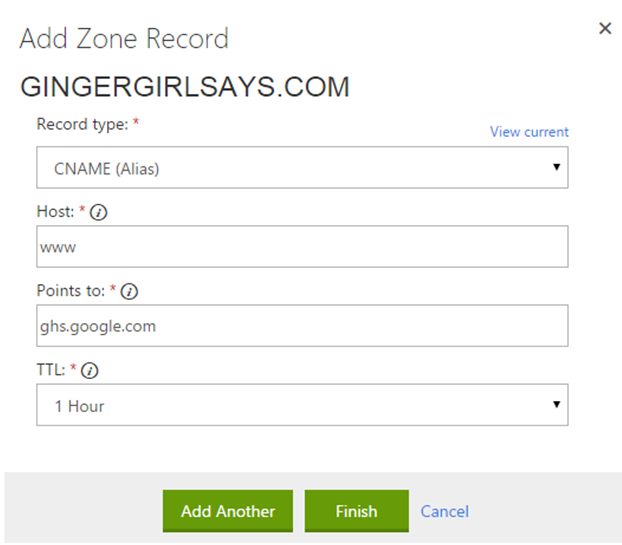
9. You now want to add a record to your zone file so the internet knows exactly where it’s going to. In the section where it says Name, Label or Host simply enter “www” and list ghs.google.com as the Destination, Target or Points to.
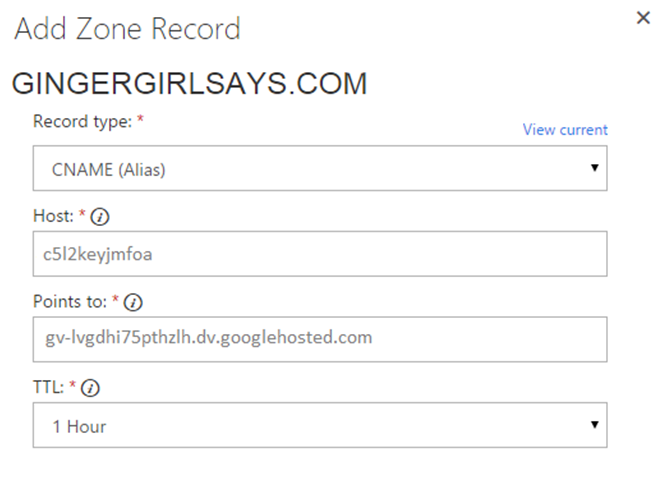 10. Select “add another” and enter the second CNAME in exactly the same way. This time you’ll be using those strings of jumbled up letters and numbers you saw on your Blogger page (see part 7).
11. Once you’re done adding both CNAMEs to your DNS file you need to head back over to your Blogger settings page and select “Save” again where you entered your domain. Providing you entered all of the details correctly you should get a notification to say that all is a-okay!
And you’re done!*
Your updated details are going to need a bit of time to propagate before your blog updates itself. GoDaddy will usually advise that these changes could take up to 24 hours to complete but they usually update in 1-2 hours.
*12. (Optional) You can also enter A-records in the same way that you’ve added CNAME. These A-record links your domain sans le www. (example.com) to an actual site (www.example.com). If you don’t do this the people who leave off the “www” when searching for your page will see an error page.
To add your A-records, add a new zone file as before but change the record type in the drop down menu “A” and list the I.P. addresses shown below in the “A” section. You will need to create four separate A-records that correlate with the below addresses:
216.239.32.21
216.239.34.21
216.239.36.21
216.239.38.21


It’s been a while since I bought my domain, but I do remember it being much easier than I feared it would be. The only thing I’d warn about though (and that I found out later), is that unless you anonymise it or supply a fake address, your name and home address will be visible on who.is.
I have just done this! Wish I had your how to before I did it!
sophielfarrell.
I’m so pleased I managed to help you out! WOOHOO! x